Automating Relationship Creation in a Company
Gainsight NXT
This article supports Gainsight NXT, the next evolution of the Customer Success platform. If you are using Gainsight CS Salesforce Edition, you can find supporting documentation by visiting the home page, and selecting CS > Salesforce Edition.
Not sure what your team is using? Click here.
重要 - 画像/情報は四半期ごとのリリースで更新されます!
四半期ごとのリリースにて、最新の機能・情報を反映し、画像を含めた情報は更新されます。
Overview
There can be multiple instances and use cases to create Relationships automatically as per your requirement. In this article, rule configuration is explained for the following use case.
When a new business deal is closed, you can track it as a new Relationship. However, creating relationships manually every time a new deal is signed can be tedious. This article explains how to create a rule which automatically creates Relationships based on set criteria.
Assumptions
- A custom object called Project exists. When a new opportunity is identified, it is logged as a new project record.
- The Project object has a Status field. When this field is set to Won, the opportunity is considered won.
- When an opportunity is won, the corresponding project record is converted into a new Relationship.
- The Project object has a lookup to Company and Relationship Type fields.
- A custom field Business Region exists in Project object. This field tracks the region from which customer is operating.
- A custom field Geographical Region exists in Relationship Type object. This field is equivalent to the Business Region object and tracks the region from which customer is operating.
Create Rule
To create a Rule:
- Navigate to Administration > Rules Engine.
- Click + RULE. Create Rule window is displayed.
- Perform the following actions:
- Rule For: Select Company.
- Rule Name: Enter a name of the Rule.
- Folder: Select a folder from the drop-down list.
- (Optional) Description: Enter a description for the rule.
- Click NEXT. The Setup Rule window is displayed.
Setup Rule
Perform following actions in the Setup Rule page:
- Click DATASET.
- Enter Task Name and Output Dataset Name.
- Select the source object, Project here from the Source Object drop-down list.
- Drag and drop the following fields to the Show section:
- Project Name
- GSID
- Company ID -> Name
- Relationship Type ID -> Name
- Business Region
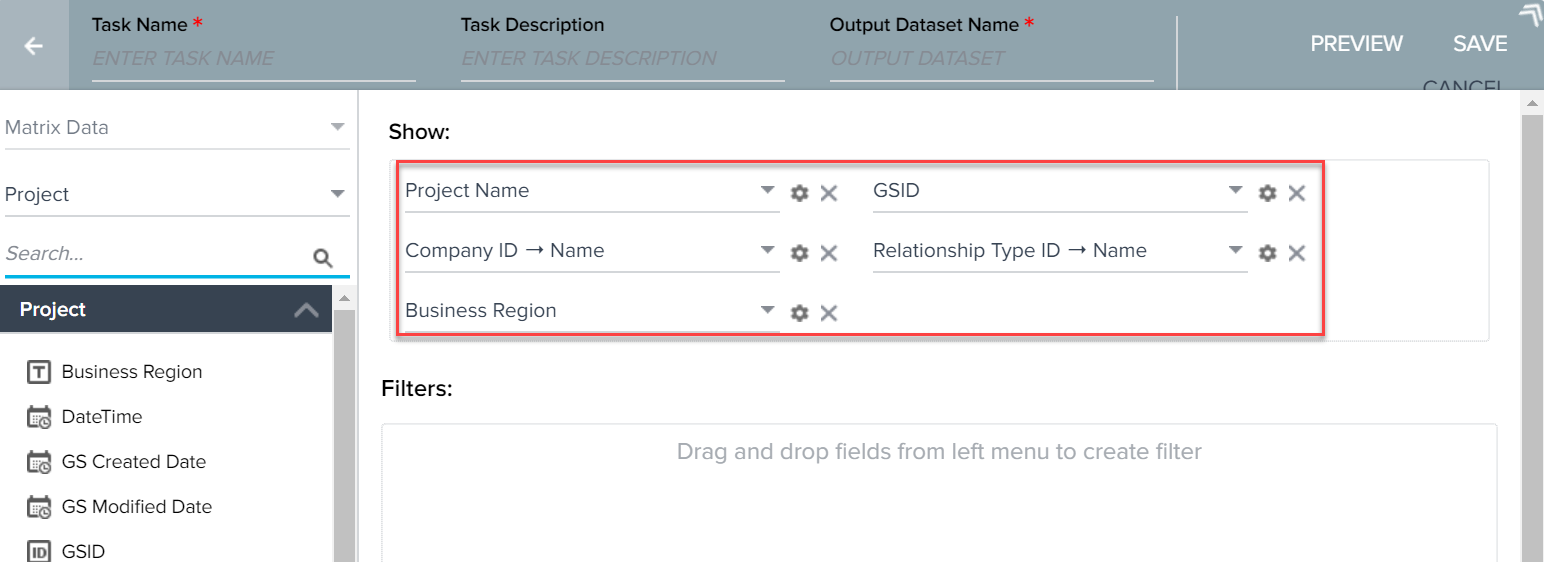
- In the Filters section, add a filter to fetch data only for those project records with Status as Won.
- Click SAVE.

Setup Action
Perform following actions in the Setup Action page:
- Navigate to the Setup Action page.
- Click + ACTION.
- Select Load to Relationship V2 from the Action drop-down list.
- Select Upsert from the Operation drop-down list.
- Click the Import Lookup icon for Relationship:: Type Id field. The Data import lookup configuration window is displayed.
- Map the Business Region field from the Project object with Geographic Region field from the Relationship Type object.
- Click APPLY.
- Click the Import Lookup icon for Relationship:: Company Id field. The Data import lookup configuration window is displayed.
- Map the Company ID Name field of project object with Name field of Company object.
- Click APPLY.

- Map the Project Name field from Project object with the Name field in Relationship object and mark .
- Perform other mappings as required.
- Select at least one field mapping to mark as identifier for Upsert/Update operation.
- Click SAVE.
- Click RUN NOW to run the rule immediately or schedule the execution of the rule.